How to Find, Generate, and Annotate Citations with Our Citation Machine
MyEssayWriter.ai’s citation machine simplifies the often tedious task of finding, creating, and annotating citations for your research. Featuring three features, you can find sources, cite them and generate annotations all in one place.
Read on to learn how to get the right use of it:
How to Use the Citation Machine Tool
Our Citation Generator Tool is a multifunctional tool designed to make your research process smoother. With three distinct features—Citation Finder, Citation Generator, and Annotation Generator—this tool covers all your citation needs in one place.
Let’s see how to use each one of these:
How to Use the Citation Finder
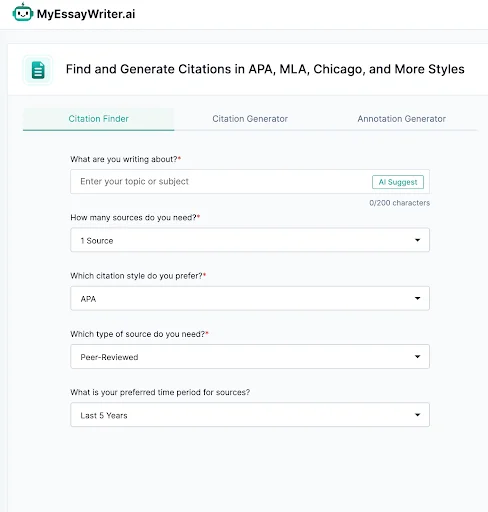
Step 1. Enter Your Topic or Subject
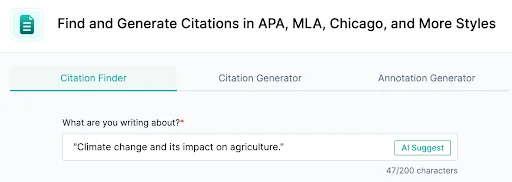
Start by entering the topic or subject related to your research project. This helps the tool narrow down the most relevant sources for your citation needs.
-
For example,
Step 2. Specify Number of Sources
Next, decide how many sources you need for your citation list. This can vary based on the length and depth of your project.
-
For instance,

Step 3. Select Citation Style
From the dropdown menu, choose the citation style required for your work. Options include popular styles such as APA, MLA, Chicago, AMA, IEEE, and many others.
-
Example:

Step 4. Specify Type of Citation
Select the type of source you need for your citations, such as peer-reviewed articles, books, conference papers, websites, or case studies. This ensures the tool provides you with appropriate and credible sources.
-
For example,

Step 5. Set Time Period for Sources
Choose the timeframe for the sources you need. This allows you to filter sources based on their publication date, ensuring they are relevant to your research.
-
For instance

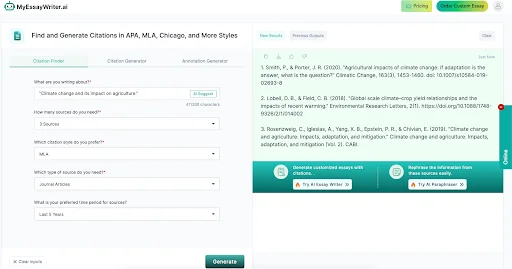
Step 6. Generate Citations
Finally, click the "Generate" button to get your list of citations. The tool will provide a list of sources that match your criteria, ready for you to use in your work.
How To Use The Citation Generator
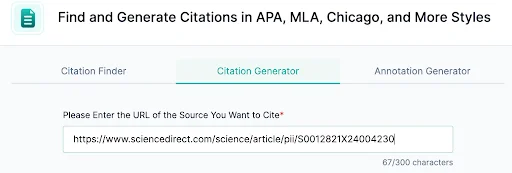
Step 1. Enter the URL of the Source
Start by pasting the URL of the source you wish to cite into the provided text box. The tool will use this URL to retrieve the source's details and create a citation.
-
For example:
Step 2. Choose Citation Style
Next, select the citation style required for your project. The dropdown menu includes popular citation styles such as APA, MLA, Chicago, AMA, and more.
-
Example:

Step 3. Generate Citation
Once you've entered the URL and selected the citation style, simply click the "Generate" button. The tool will instantly create a formatted citation based on the URL you provided.

This citation can then be copied directly into your work.
How to Use Annotation Generator
Step 1. Enter Your Topic
Begin by entering the topic or subject for which you need citations and annotations. This helps the tool understand the focus of your project.
-
For example:

Step 2. Specify Source Quantity
Indicate how many sources you need for your project. This helps the tool generate the appropriate number of references to support your research.
-
Example:

Step 3. Choose Citation Style
Select the preferred citation style for your project, such as APA, MLA, Chicago, or another recognized style. This ensures the annotations match your formatting requirements.
-
Example:

Step 4. Pick Source Type
Choose the type of sources you are looking for. You can select from books, journal articles, websites, or other relevant materials to fit your needs.
-
Example:

Step 5. Set Time Frame
Specify the time frame for the sources you wish to use. You can choose from options like "last 5 years," "last 10 years," or "last 20 years" to ensure the content is current and relevant to your topic.
-
Example:

Step 6. Generate Annotations
Once all options are entered, click the “Generate” button. The tool will compile citations along with brief annotations, summarizing each source and explaining its relevance to your topic.
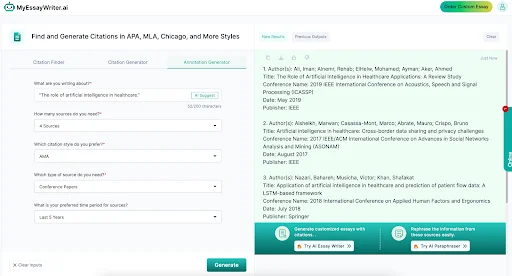
These annotations will save you time by providing context for each reference, making it easier to integrate them into your work.
Now that you know how to make the most of each feature, you can confidently tackle your citations and annotations with ease.
Ready to take your research to the next level? Visit MyEssayWriter.ai to discover how our AI Essay Writer can help you create flawless essays, complete with properly formatted citations and annotations, faster than ever!


