Using MyEssayWriter.ai’s Email Writer Tool: A 7-Steps Guide For Success!
MyEssayWriter.ai’s Email Writer is your go-to solution for generating professional, well-structured emails with ease.
In this guide, we'll walk you through how to make the most of this tool, guaranteeing your emails are polished, impactful, and tailored to your needs. Whether you’re drafting formal business emails or casual correspondence, our tool offers flexible features to streamline the process and help you communicate more effectively.
Stay with us as we guide you step-by-step through our Email Writer Tool, making your email writing faster and more efficient!
Step 1: Choose Your Preferred Language
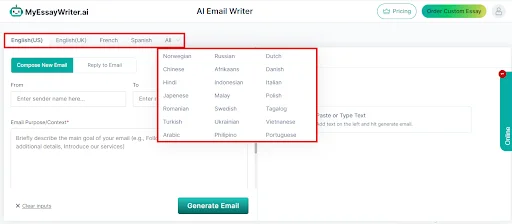
The first step to using this tool is selecting your preferred language. While the tool defaults to English (US), users have the flexibility to choose from a variety of languages to craft emails that meet their specific needs. This indicates that no matter your audience or purpose, you can communicate effectively in the language of your choice.
Step 2: Select Your Email Mode
Next, you’ll need to choose the mode for your email. MyEssayWriter.ai’s Email Writer tool offers two main options:
Compose New Email,
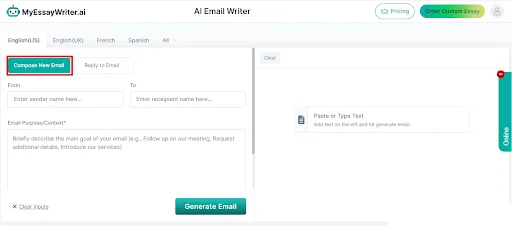
and Reply To Email.
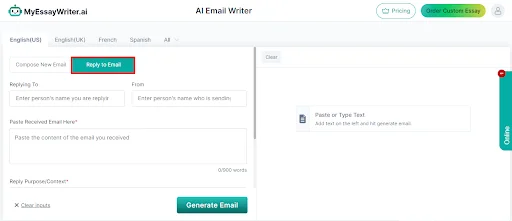
First, we’ll walk you through the steps for composing a new email, explaining how to generate a well-structured message from scratch. Once we’ve covered that, we’ll dive into the reply-to-email mode, guiding you on how to craft thoughtful, context-appropriate replies to existing emails.
Step 3: Fill In 'From' & 'To' Input Fields
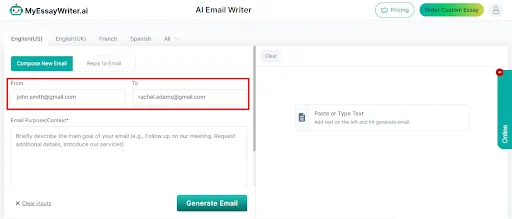
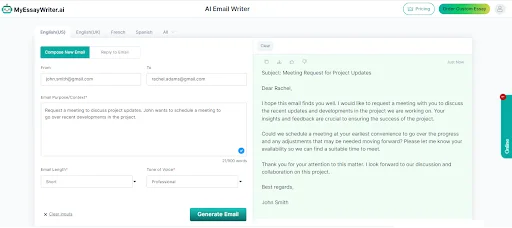
In this step, you'll need to input valid email addresses in both the "From" and "To" fields.
The "From" field should contain the sender's email address, while the "To" field is for the recipient's email. Verifying the accuracy of these details is essential for the successful delivery of your email, whether you’re composing a new message or replying to one.
Step 4: Define Email Purpose/Context
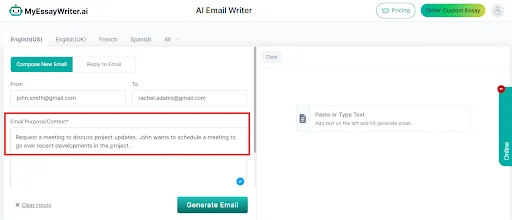
At this stage, you’ll need to briefly specify the main goal or purpose of your email. Whether you're sending a formal request, providing an update, or responding to a query, a clear description of the email's objective will help the tool tailor the content to match your needs. This step makes certain that your message is concise and aligned with its intended purpose.
Step 5: Pick An Email Length Option
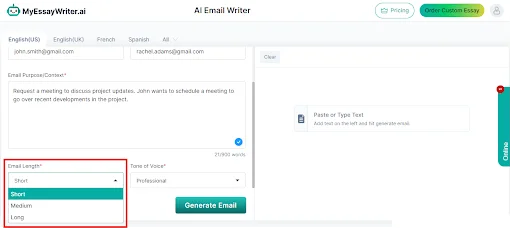
In this step, you can choose the desired length for your email by selecting one of three options from the dropdown menu: short, medium, or long. The length you choose will impact how detailed or concise your email will be, helping you to customize the message to your specific requirements, whether you're aiming for a quick note or a more detailed communication.
Step 6: Select Your Preferred Tone of Voice
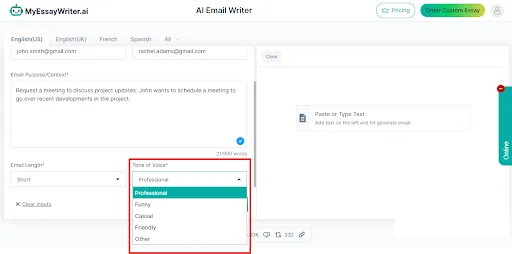
At this stage, you can decide the tone of voice for your email by selecting an option from the dropdown menu. Whether you want the message to sound professional, friendly, casual, or funny, setting the right tone helps ensure that your email resonates with the recipient and matches the intended mood or style of communication. This flexibility allows you to adapt your message based on the context and audience.
Step 7: Generate Email Instantly
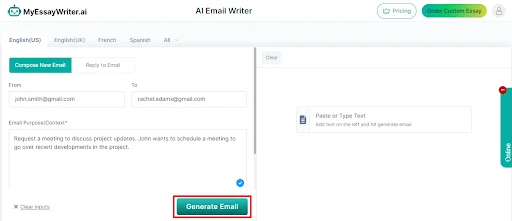
In this final step, you're ready to generate your customized email. Simply click the "Generate Email" button, and within seconds, you'll receive a professionally tailored email based on the inputs you provided. This quick and efficient process confirms that your message is ready to go, whether you're composing a new email or replying to an existing one.
Shown next is a sample email generated by MyEssayWriter.ai’s Email Writer Tool. This email is constructed based on the inputs provided from the user's end.
Next, let’s explore the steps for generating a reply to an email. In Step 2, select the "Reply To Email" mode if you wish to create a response to an email you have received. This option allows you to effectively craft a reply while certifying that your message is tailored to the context of the original email.
Step 3: Fill In 'Replying To' & 'From' Input Fields
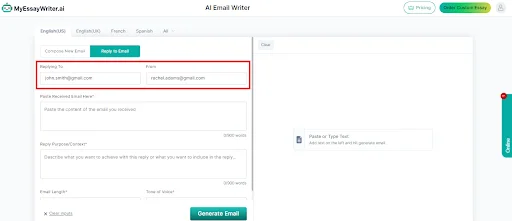
In this step, you’ll need to fill in both the "Replying To" and "From" input fields with valid email addresses. The "Replying To" field should contain the email address of the original sender, while the "From" field should have your email address. Accurate entries in these fields are crucial to be sure that your reply is correctly attributed and reaches the right recipient.
Step 4: Copy & Paste The Received Email
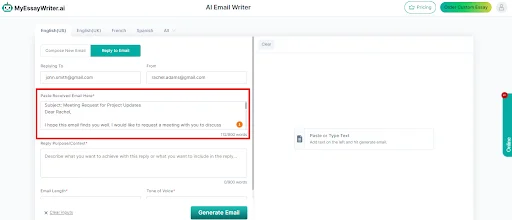
Here, you will need to paste the entire content of the email you received into the designated field. By including the original email, you provide context for your response, allowing the tool to generate a reply that is relevant and appropriately addresses the points raised by the sender. This helps ensure that your reply is coherent and directly relates to the conversation at hand.
Step 5: Specify The Reply Purpose/Context
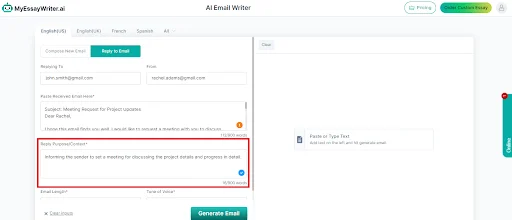
In this step, you will need to briefly describe the main objective of your reply to the email. Clearly outlining the purpose of your response will help prove that your message is focused and relevant, whether you are providing information, addressing a concern, or confirming a request. This context allows the tool to optimize your reply effectively, making it more impactful and aligned with the original conversation.
Now, proceed to follow Steps 5, 6, and 7 as outlined earlier. These steps will guide you in defining the length of your reply, selecting the desired tone, and generating your email efficiently. By adhering to these steps, you’ll rest assured that your response is well-structured and effectively communicates your message.
Below is a sample reply email created using our AI Email Writer tool. This email has been generated based on the user’s provided inputs. Have a look:
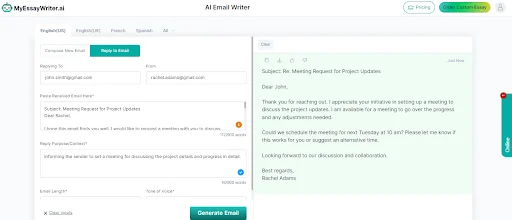
Once your email is generated, you’ll find it’s incredibly easy to either copy the content or download it directly from the tool page. With just a click, you can seamlessly transfer your custom email to your preferred platform.
Besides, if you're ready to start fresh, the "Clear Inputs" button, conveniently located at the bottom left-hand corner, lets you erase all input fields in one go—making the process smooth and efficient for your next email.
All in all,
MyEssayWriter.ai’s Email Writer Tool simplifies the process of crafting professional emails, whether composing a new message or replying to one. By following the straightforward steps outlined, users can easily generate tailored emails that effectively communicate their intent. Don’t miss out on enhancing your email writing experience!
Also, give our essay writer a try today. We assure you that you will be amazed by the results!


